
Poinsettia Card Kits
- Kim Webb

- Oct 6, 2021
- 3 min read
I have been on a roll making beautiful Poinsettia Christmas Cards for the last week or so. Once I decided to offer them as card kits on my website, I couldn't stop trying to come up with the "best of the best" to offer. I think I made 6 different designs then asked my daughter (who is naturally gifted in design) and my co-worker (who is crazy and shoots me straight every time) which cards they liked best. They both chose this one as their number one!

I loved this design as well. I got the element of the mat peeking out from the scalloped Soft Suede piece from a post Mary Fish shared a week ago or so. Her card was a fall card and used blues, yellows and whites, and I just loved that little bit sticking out from the scalloped shape. On this sample, I used her measurements that she offered in her email, but for the first set of card kits I made, I added a tiny bit to the length going from 4 7/8" to 4 15/16". I know that's not a commonly used measurement, but to me, it evened it out and made enough difference for me to use it in my .pdfs I made for the kits. For anyone who struggles with reading a ruler, let me give you the best tool I've ever found for free on the internet. It's a very enlarged picture of one inch of a ruler. It hangs on my bulletin board just above my paper trimmer, and I use it All. The. Time. If you don't have one of these, click below to download and print a copy for the space above your cutter.
My second favorite card was the horizontal gate fold card. I have a notebook that I jot things down in and here's what it said underneath Horizontal Gate Fold: "Cut base to 4 1/4" x 11" and score at 2 3/4 on each end." Yep, that's all it said, so I figured out the other measurements and included it in my card kits.

I used last year's Designer Series Paper for all of these kits, because I don't think there is anything better than when Stampin' Up! makes the paper to match the stamp and die set. It's just perfect. I used Shimmery White card stock for the Poinsettia petals because that paper is more of an ivory color rather than stark white, and it blends well with the DSP. I also used Gold Holy Leaves from the July-December Mini Catalog which were the perfect size for this Poinsettia. I have to admit, I was a little disappointed when I received the Gold Holy Leaves because I just imagined they would be much bigger. All that has changed however simply because I found a perfect place to use them.
I wanted to include at least one traditional, full potential (meaning I used every petal offered in the die set)for one of the card kit choices, so I came up with this one. I used Real Red card stock for the Poinsettia petals and Old Olive for the Holly leaves. I sponged the edges of the Holly leaves giving them a little life.
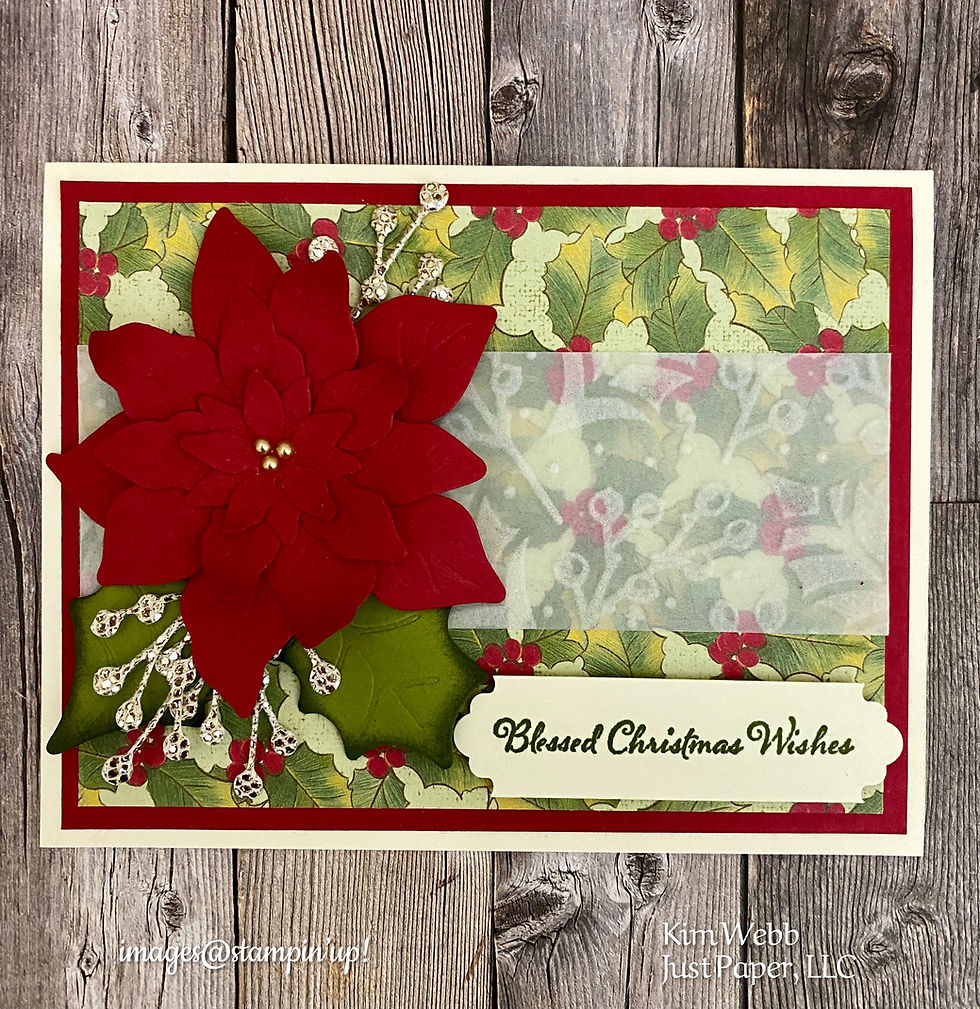

I also used some of the Plush Poinsettia Specialty Paper on this card which is the White Vellum with raised felt images. The Be Dazzling paper from the Sale-a-bration Free Catalog made the best berries for these cards. I ended up loving that paper too despite what I said when I first saw it in the book.
So, if you are interested in purchasing the Poinsettia Petals card kits, click here to shop all my kits now. The price for this particular kit is $28 for 6 cards kits, 2 each of 3 designs, and that price does include tax and shipping. I have a very limited number of these kits available, because as I said, the paper is from last year's DSP and unfortunately, when it's gone, it's gone, just as these kits will be.
Thank you so much for reading my blog today and I hope you enjoy some quality crafting time soon!
Kim Webb


Comments